Learn how to use Touch ID and protect all your information on your iPhone and iPad
Your iPhone is like your house. You have a lot of valuable things and information that's important and private for you. And just like you use a door lock for your house, you also need to also lock your iPhone. And even though Face ID is a great way to unlock your iPhone or iPad, nothing really beats the good old Touch ID, especially in this day and age where everyone is wearing a face mask. Touch ID lets you conveniently access your iPhone by using your fingerprint.
Sure, the latest iPhone models don't use Touch ID anymore, but this year's iPad, iPad Air, the second-generation iPhone SE and all recent Macbook Air and Macbook Pro models use Touch ID. Not to mention the older iPhone and iPad models still available. It doesn't seem like it's going to change any time soon, which is why it's important that you learn how to use Touch ID on your iPhone, iPad or Macbook. Here's what you need to know.
How to set up Touch ID on iPhone and iPad
You can register a fingerprint for Touch ID as part of the initial set up process on any new or restored iPhone or iPad. You can also set it up, or add additional fingers, at any time.
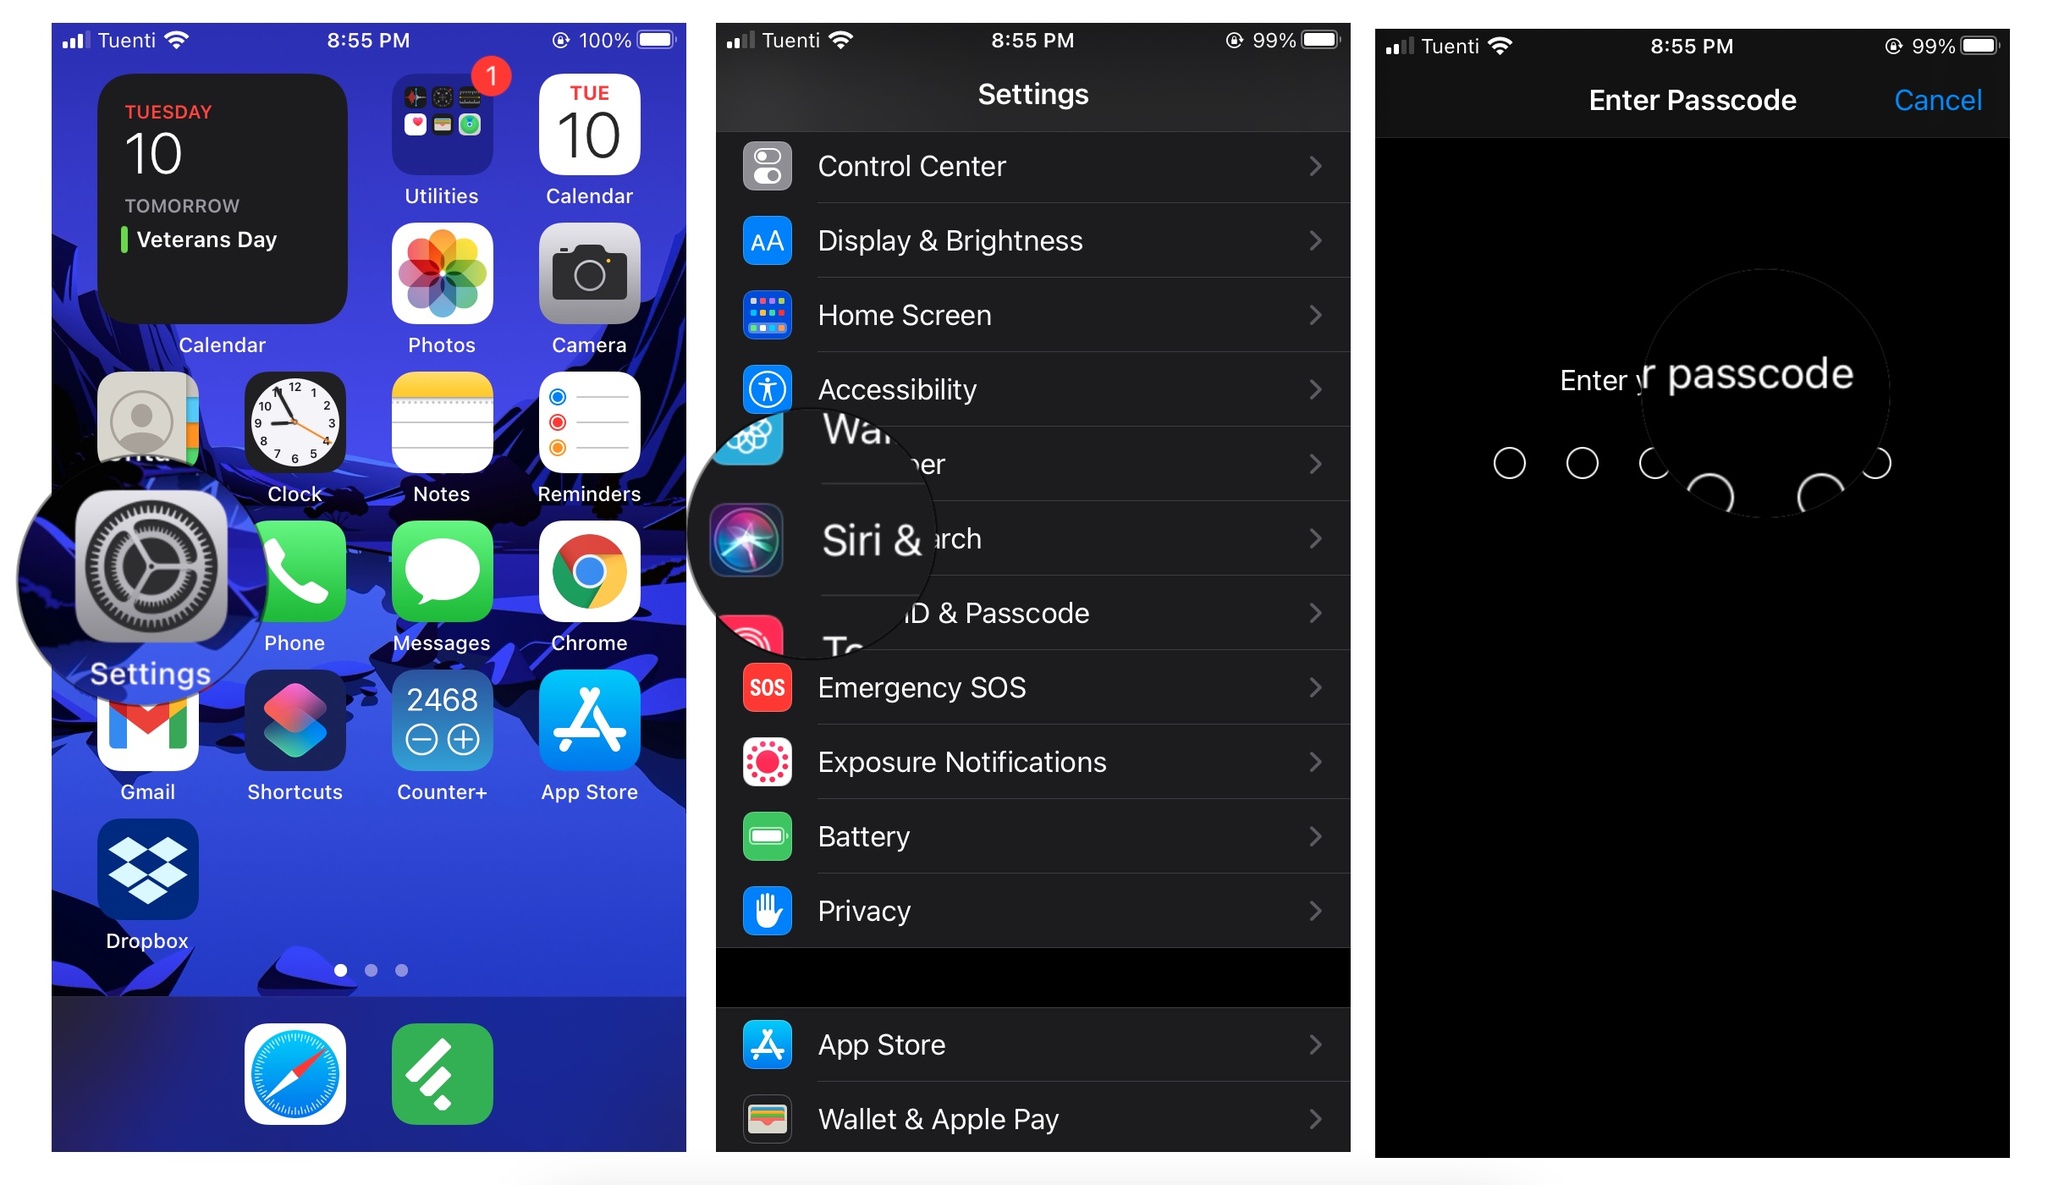
- Launch the Settings app from your Home screen
- Tap on Touch ID & Passcode
-
Type in your passcode for authorization, if asked. (Touch ID requires a passcode, so if you don't have one already you'll be asked to create one.)
-
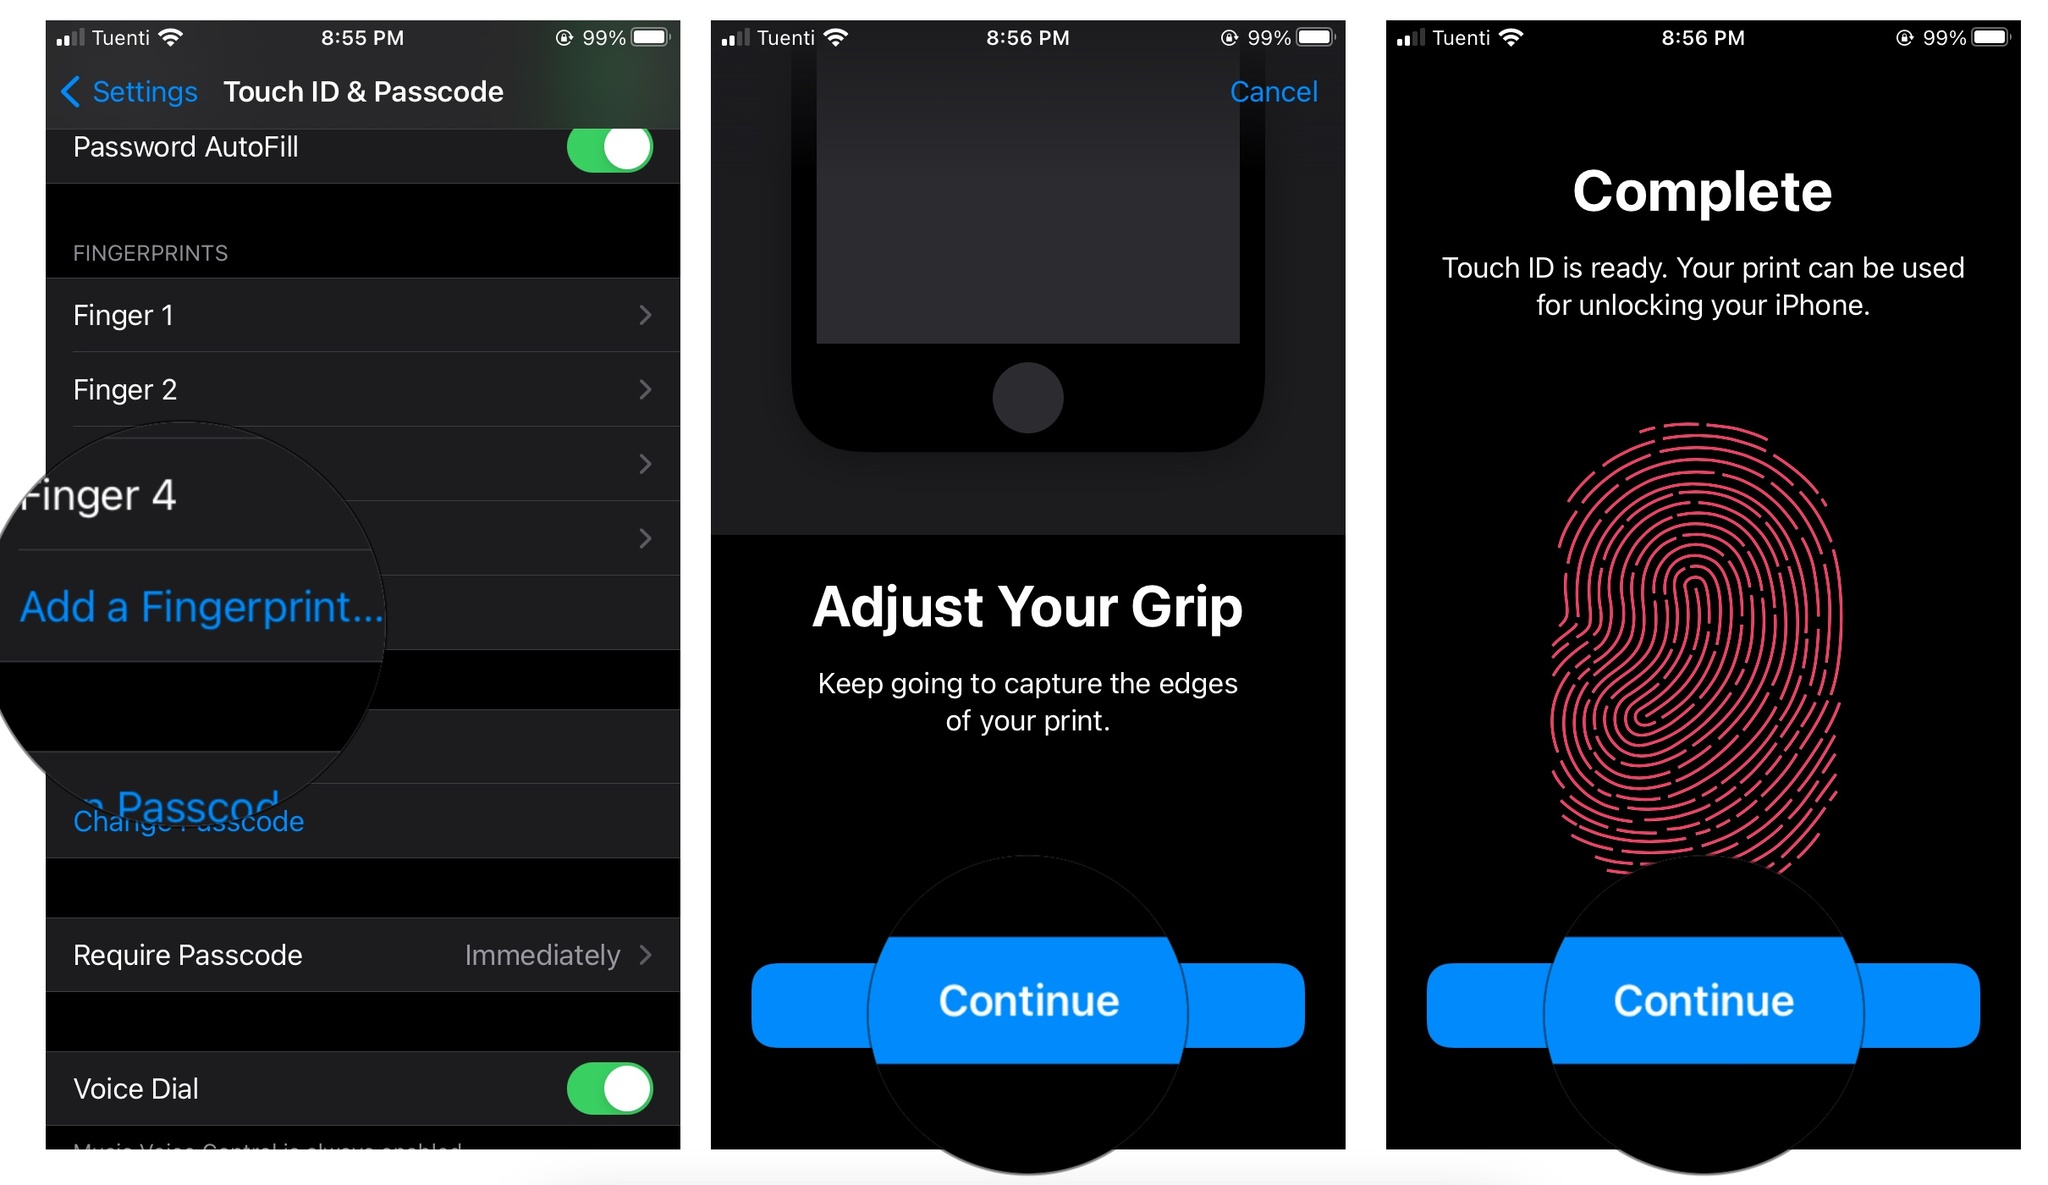
Tap on the Add a Fingerprint button.
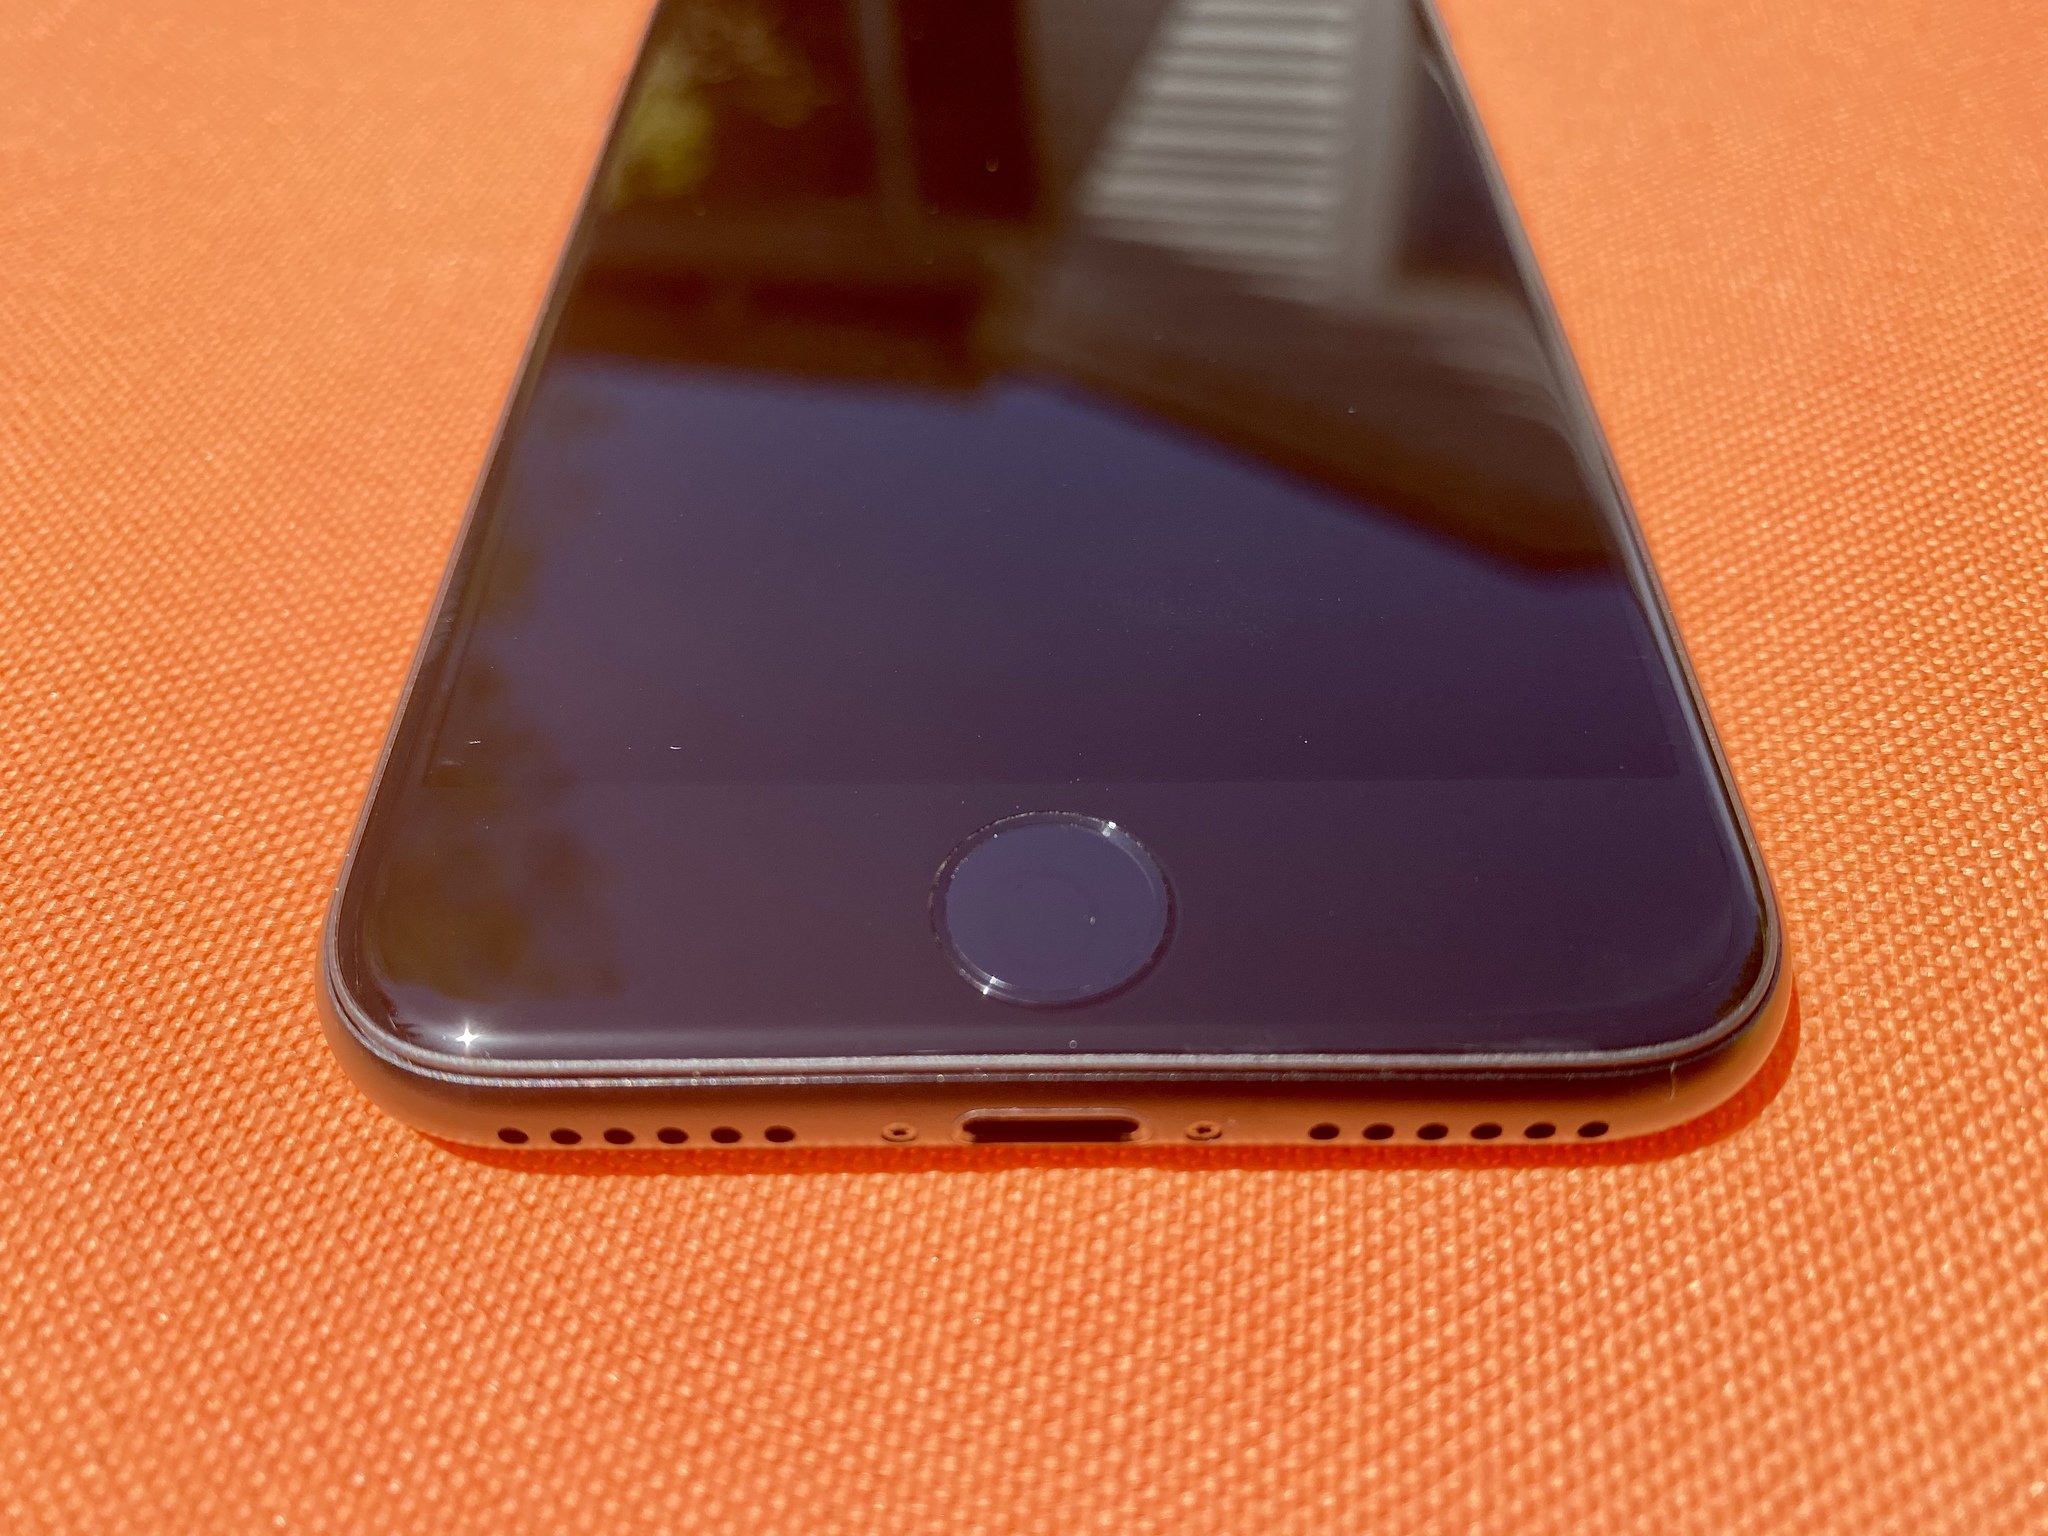
- Place the finger you want to register on the Home button and leave it there until you feel a buzz. If you're on the 2020 iPad Air, place your finger in the Power button
- Lift your finger and place it back down. Repeat each time you feel a buzz.
- Tap continue when Touch ID alerts you it has completed the first step and now requires peripheral data.
- Place the edges of the finger you want to register on the Home button or the Power button and leave it there until you feel a buzz.
- Lift your finger and place it back down. Repeat with a different edge until you've registered the entire surface of your finger.
-
Tap Continue to finish.
Repeat for every additional finger you want to add, up to five total. You can register any combination of your and other people's fingerprints, including family or staff. You can even temporarily register a travel-mate just in case of emergencies, without having to give them your passcode or password.
How to identify a Touch ID fingerprint
If you registered a fingerprint with Touch ID but don't remember which one is which — i.e., is Fingerprint 1 your right thumb or left index finger? — you can check and find out. That's how you can make sure you rename and delete the right ones in the future.
- Launch the Settings app.
- Tap on Touch ID & Passcode.
- Type in your passcode when asked.
- Scroll down to the Fingerprints section.
- Place your registered fingerprint on the Home button or the Power button.
-
Look for the label that changes color from white to gray.
How to label a Touch ID fingerprint
Rather than identifying your fingerprints each time you need them for something, you can label them to make it simpler and faster to find the one you're looking for. (And remember which and whose fingerprints are registered.)
- Launch the Settings app.
- Tap on Touch ID & Passcode.
-
Type in your passcode when asked.
-
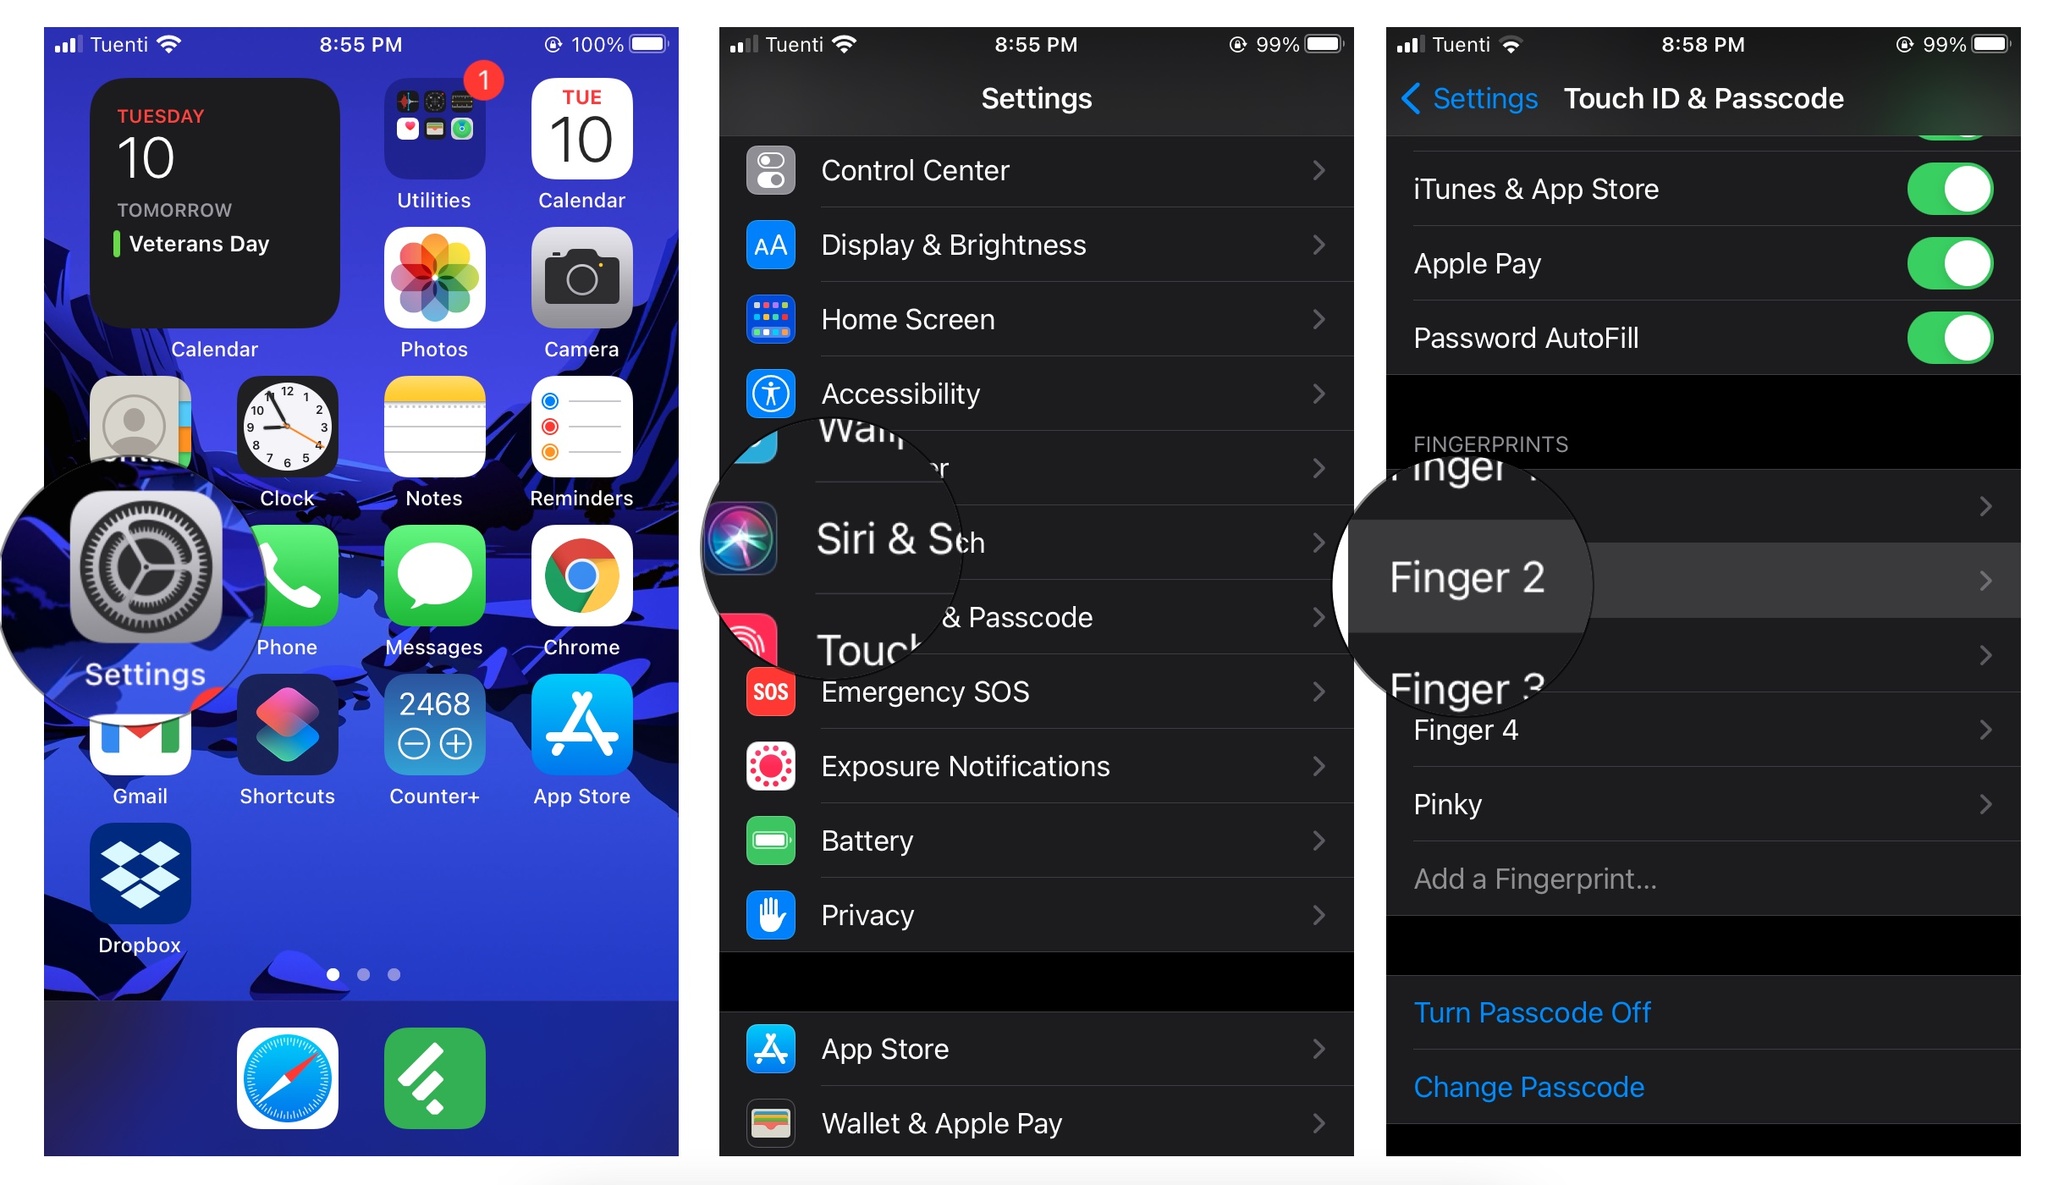
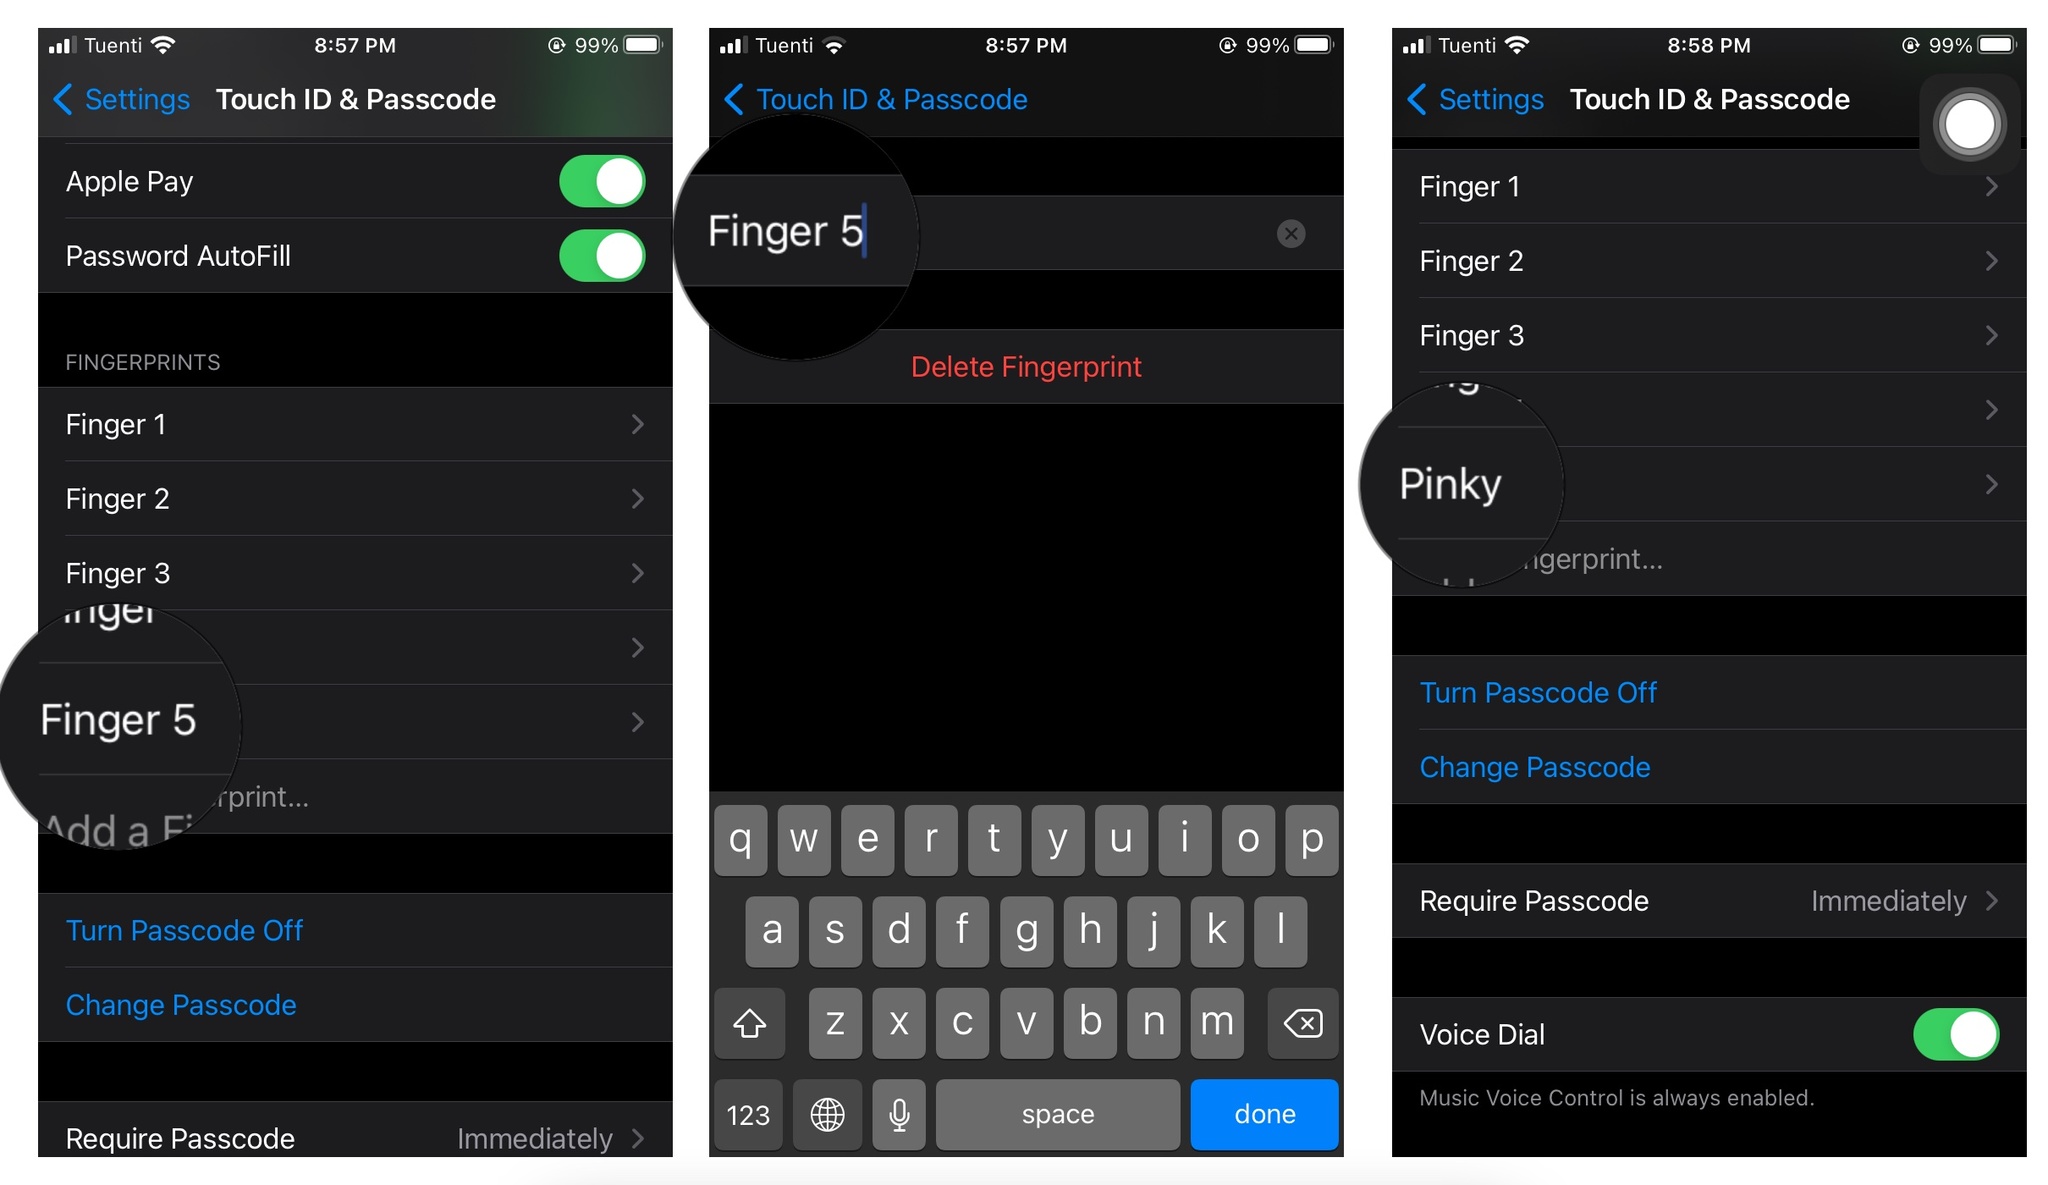
Tap on the Finger you want to rename
- Type in a new, more recognizable name for your fingerprint. (i.e. right thumb.)
-
Tap on the Touch ID & Passcode on the top right corner to go back.
Repeat steps 4-6 until all your fingerprints are labeled.
How to turn off Touch ID for the Lock screen, Apple Pay, or the iTunes and App Stores
Touch ID is meant as a convenience. If you prefer more security on your Lock screen, like a strong alphanumeric password, you can turn Touch ID off.
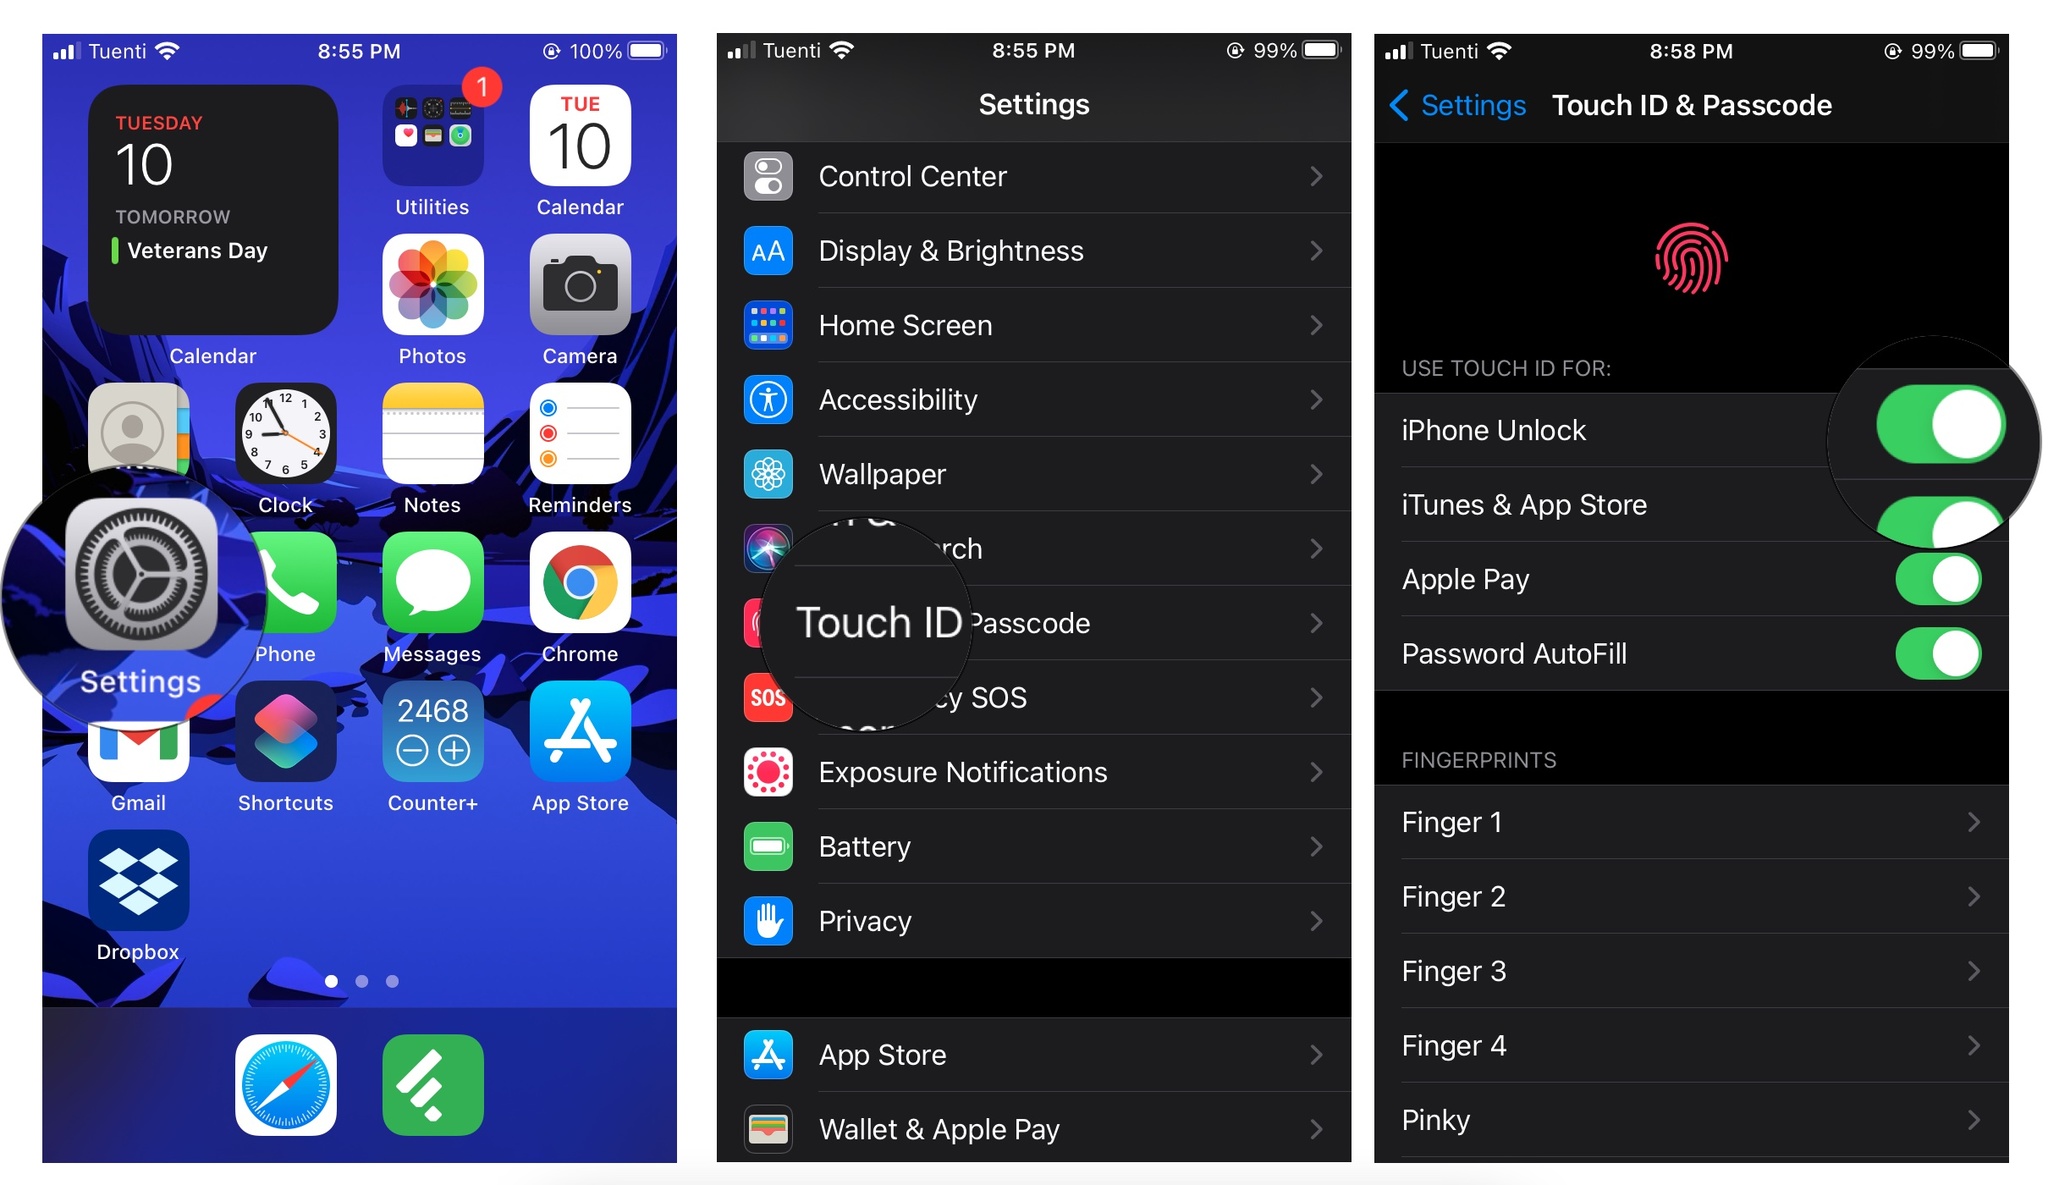
- Launch the Settings app from your Home screen.
- Tap on Touch ID & Passcode.
- Enter your passcode when prompted.
-
Switch iPhone/iPad Unlock, iTunes and App Store, Apple Pay, or Password AutoFill to Off.
How to delete a Touch ID fingerprint
If you have given someone fingerprint access to your device for an emergency, or another reason, and you don't need that person to have access anymore it's a good idea to delete their fingerprint. Also, if a fingerprint becomes glitchy, you can remove it and redo it. That's because deleting Touch ID fingerprints is even easier than adding them!
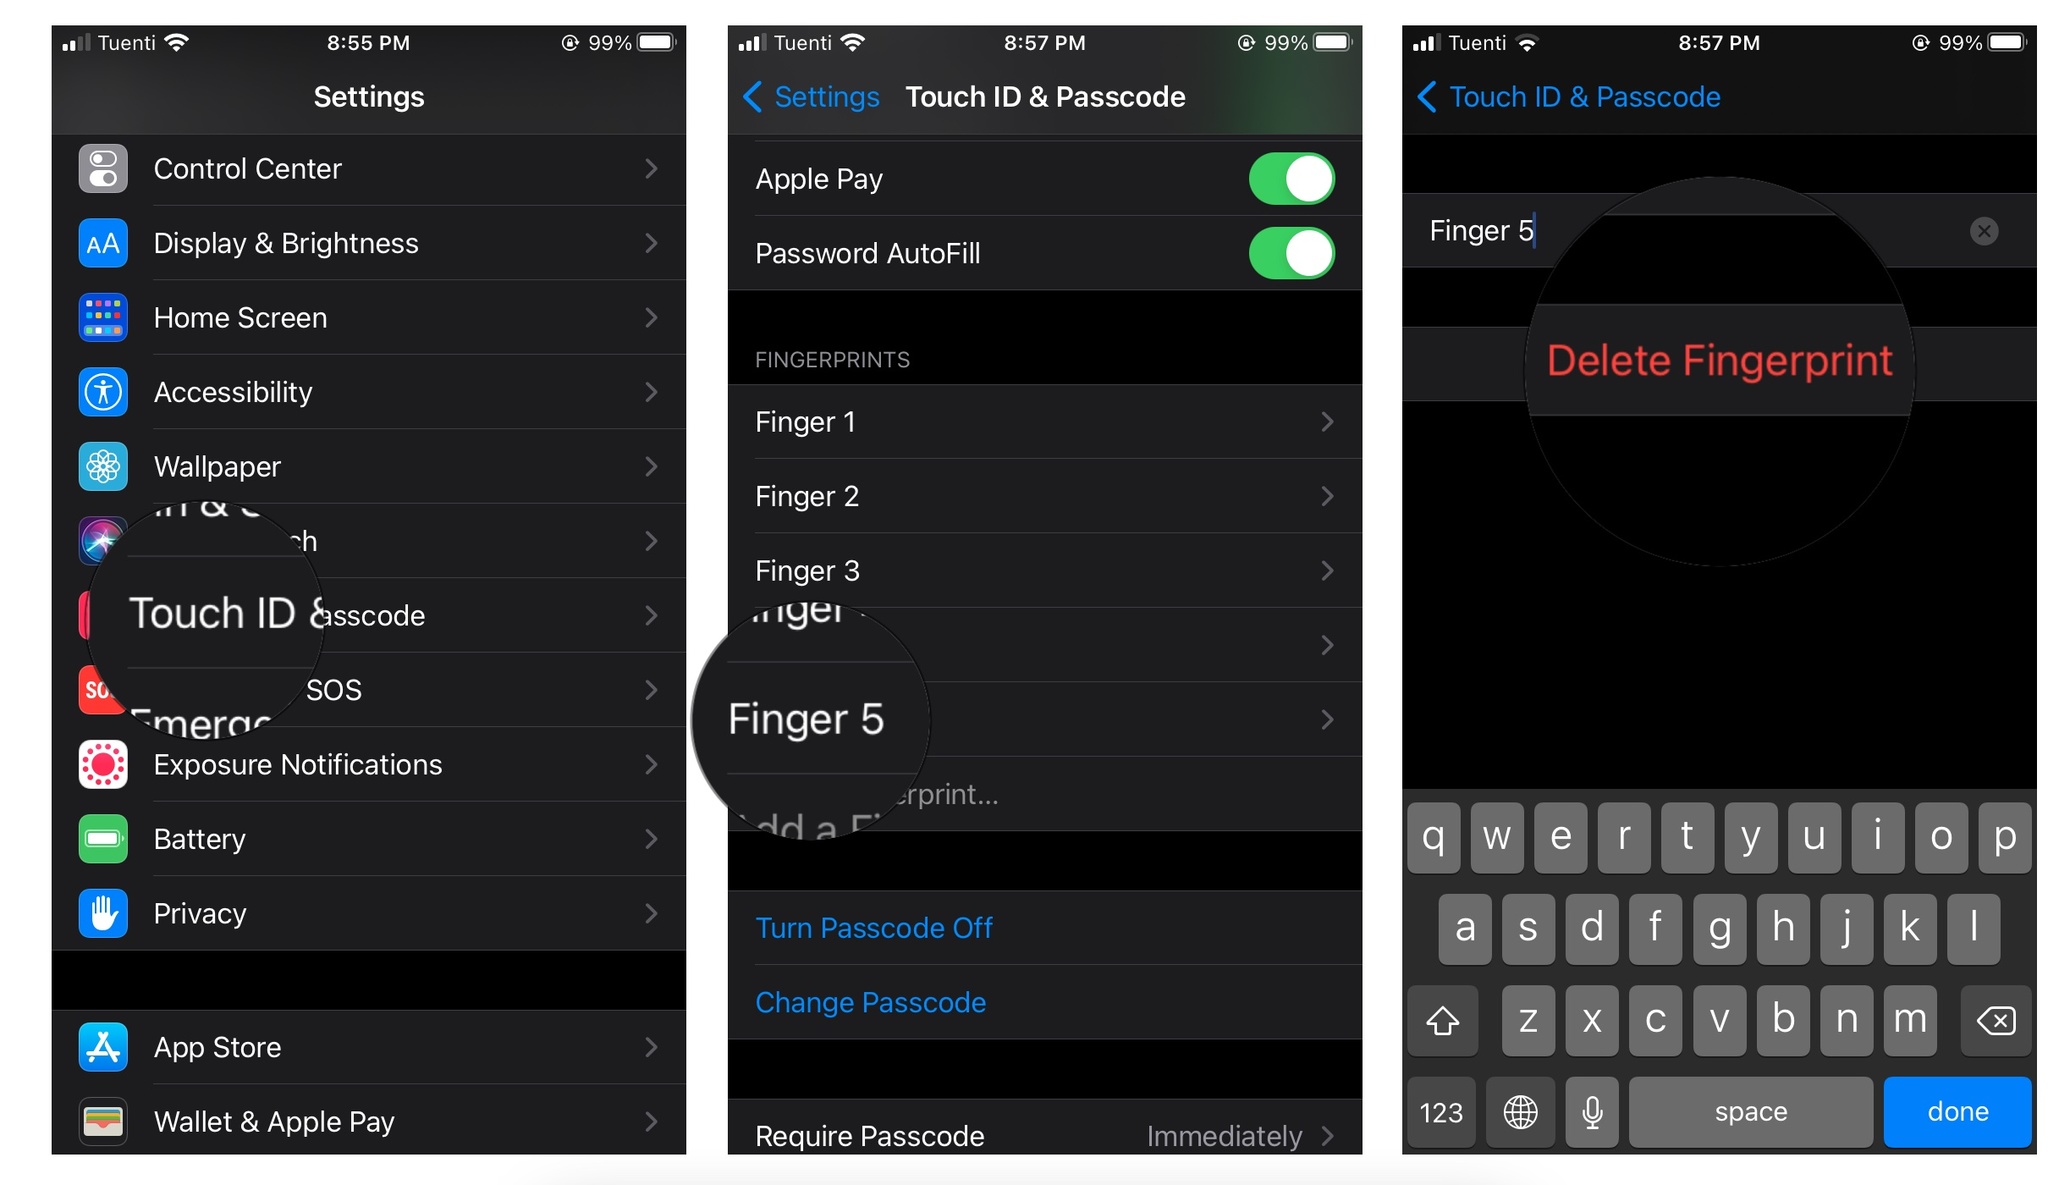
- Launch the Settings app on your Touch ID capable device.
- Tap on Touch ID & Passcode.
- Type in your passcode when prompted.
- Tap on the fingerprint you want to delete.
- Tap on Delete Fingerprint.
-
Tap on the Touch ID & Passcode on the top right corner to go back.
Repeat steps 4-6 for each fingerprint you want to delete.
Learn how to use Touch ID on Macbook
If you want to learn more about Touch ID, here you can see how to use Touch ID in your Macbook Air or Macbook Pro. Or, if you're thinking about getting a new Macbook with Touch ID, make the most out of your buck by checking the best Macbook Black Friday deals.
Questions?
Let us know in the comments.
Updated November 2020: Updated for iOS 14 and iPadOS 14.
Touch ID helps keep your iPhone or iPad secure, here's how to set it up posted first on http://bestpricesmartphones.blogspot.com

No comments:
Post a Comment