
Use encryption to protect everything on your Mac better. Here's how.
To better protect your files, Apple offers several built-in Mac encryption tools. Once implemented, the files are digitally scrambled, so you need a secret key, password, or portable RFID chip to read them. Here's a look at how to encrypt macOS.
These steps work on macOS Monterey and earlier with all of the best Macs.
How to encypt with FileVault
When starting your Mac for the first time, the system will ask you whether to use FileVault. When activated, FileVault will automatically encrypt content in the background. It uses XTS-AES-128 encryption with a 256-bit key to help prevent unauthorized access to the information on your startup disk. As a result, FileVault is the easiest and most practical way to encrypt everything on your computer. If you didn't activate FileVault when setting up your computer, you can do so manually at any time.
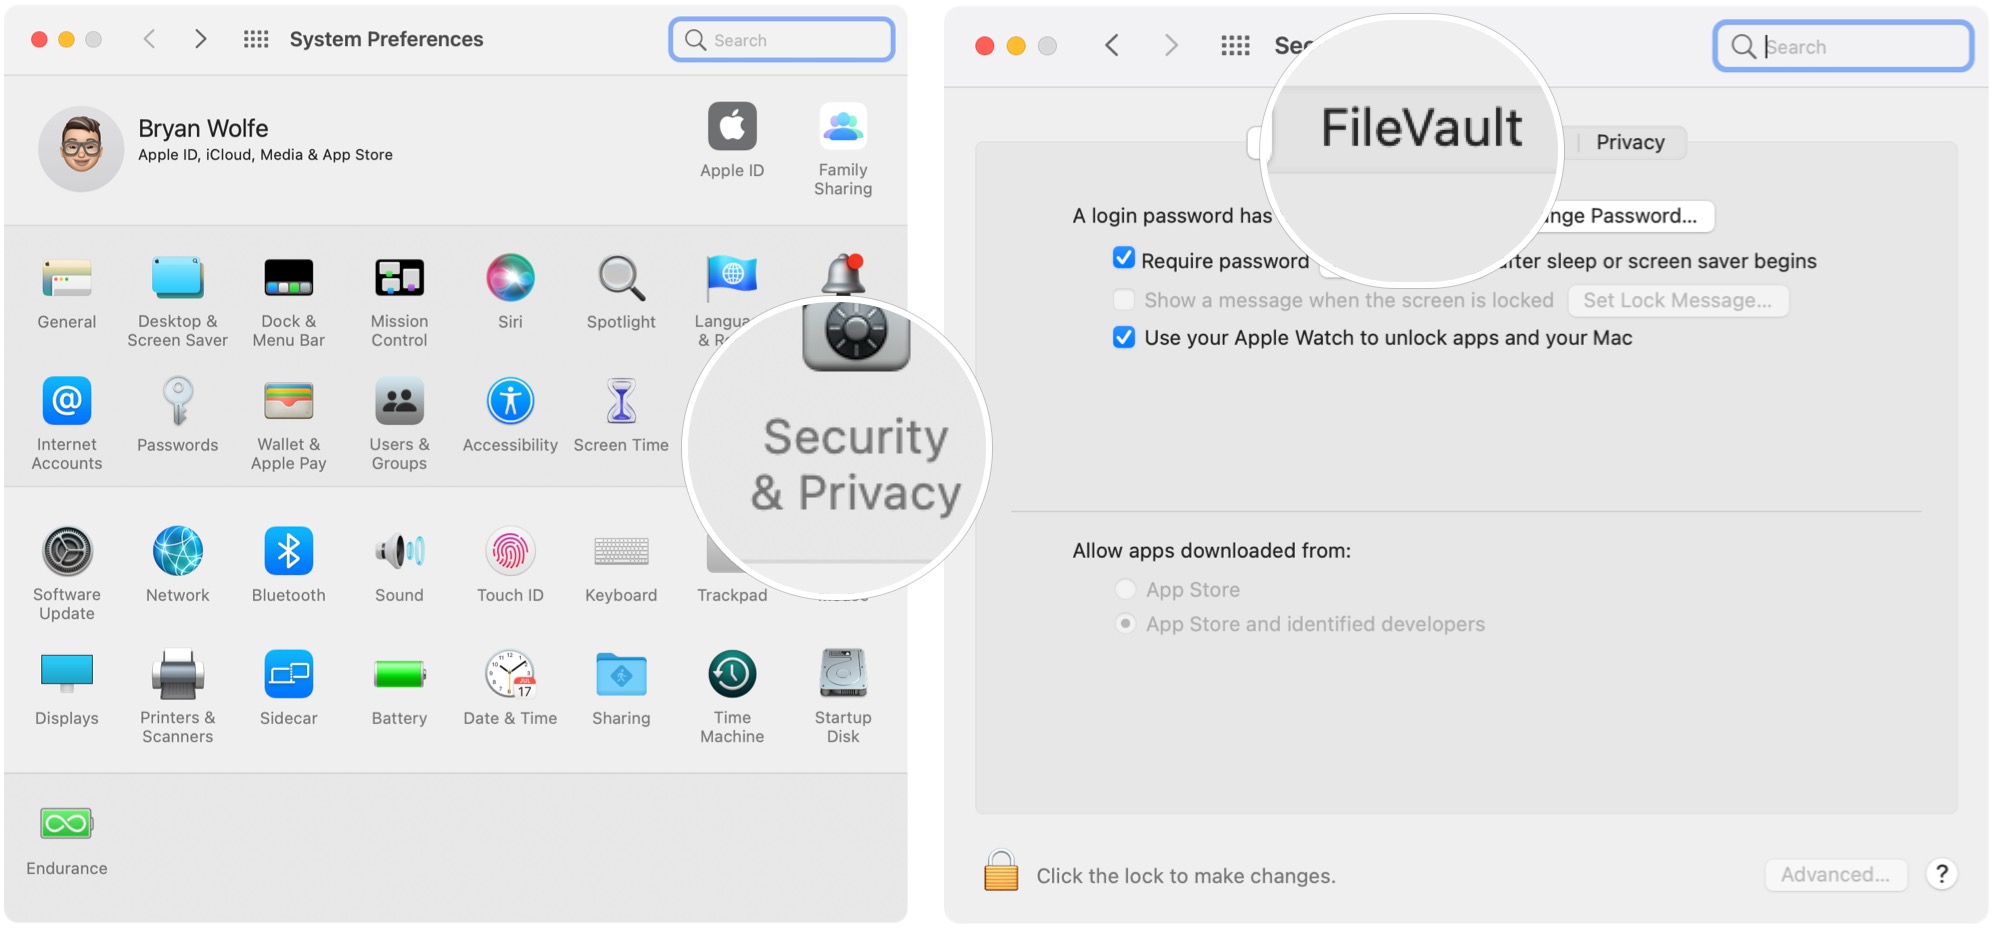
- Go into System Preferences on your Mac.
- Click Security & Privacy.
-
Choose the FileVault tab.
- Click the lock icon at the bottom left.
- Enter an administrator name and password.
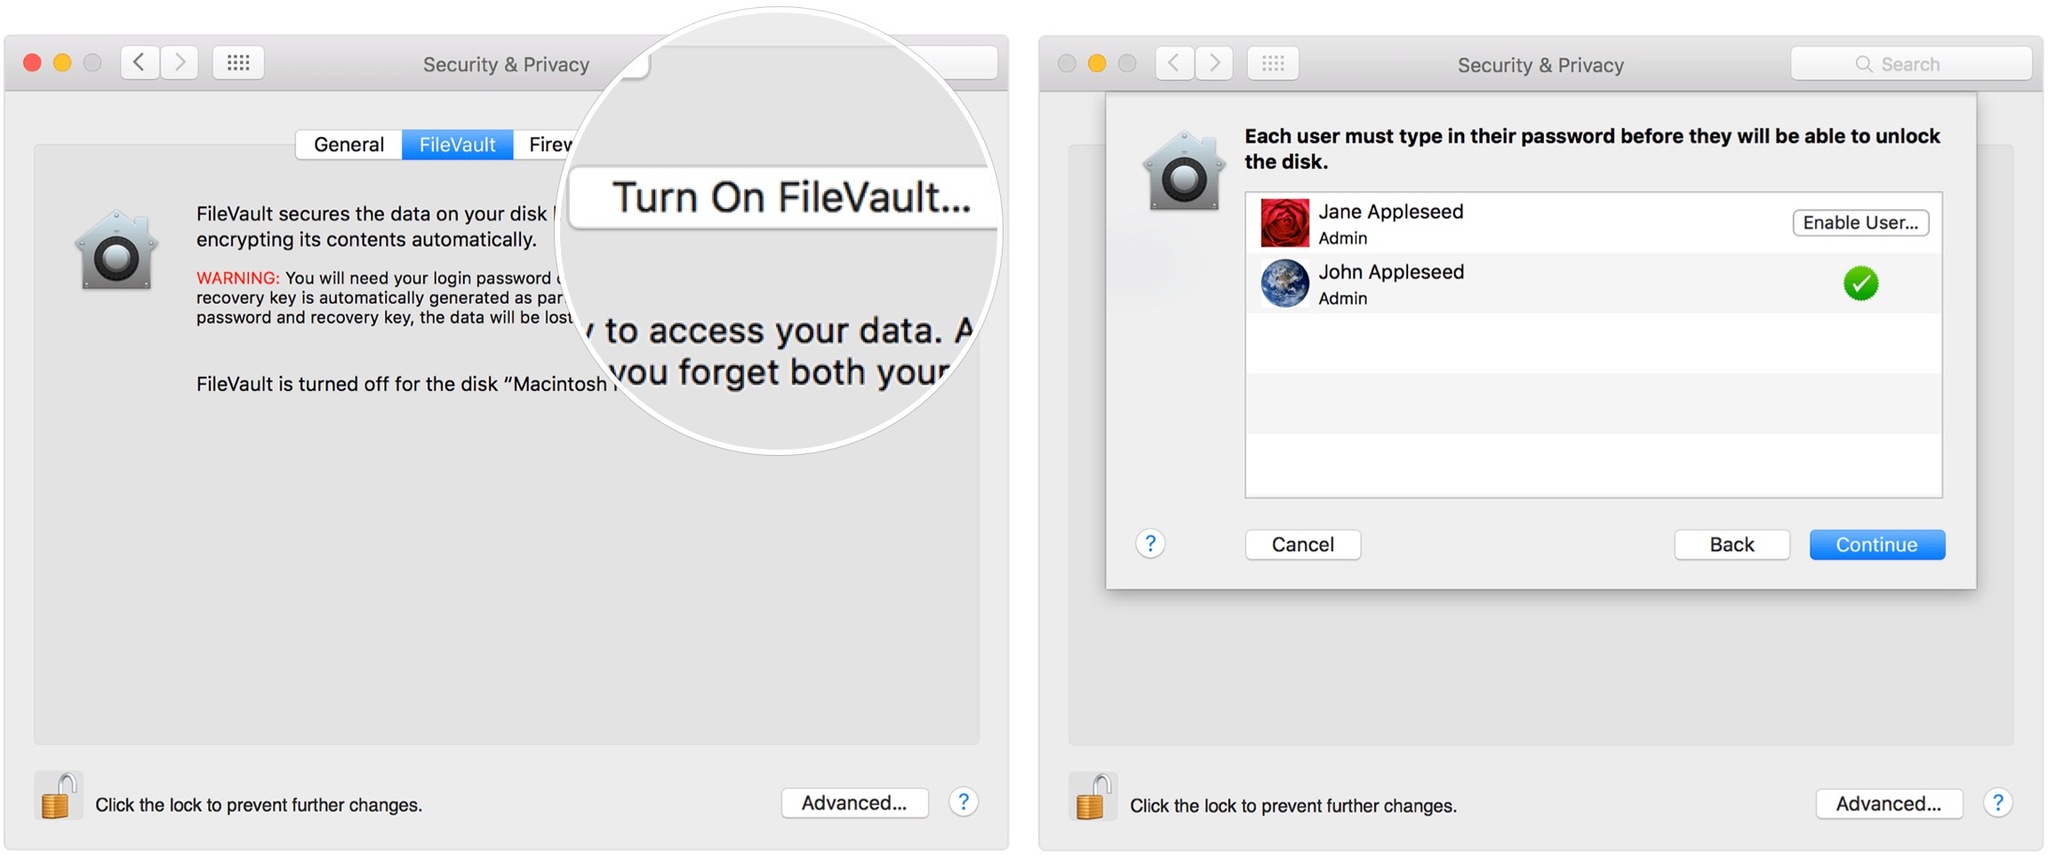
- Select Turn on FileVault. If there's more than one account on your Mac, you'll need to type in the password for those users on the next screen, or they won't be able to unlock the disk. For each user, click the Enable User button and enter the user's password. User accounts that you add after turning on FileVault are automatically enabled.
-
Click Continue.
Assuming you're Mac is using OS X Yosemite or later, you can choose to use your iCloud account to unlock your disk and reset your password.
There are various ways to choose how to unlock your Mac and reset your password when using FileVault. If you rather not use iCloud FileVault recovery, you can create a local recovery key. Keep the letters and numbers of the key somewhere safe — other than on your encrypted startup disk.
To disable FileVault
You can disable FileVault at any time by following the directions below:
- Go into System Preferences on your Mac.
- Click Security & Privacy.
-
Choose the FileVault tab.
- Click the lock icon at the bottom left.
- Enter an administrator name and password.
- Select Turn off FileVault.
How to encrypt folders
You can use Mac encryption to protect individual folders at any time. This solution is ideal when you plan on sharing the folders.
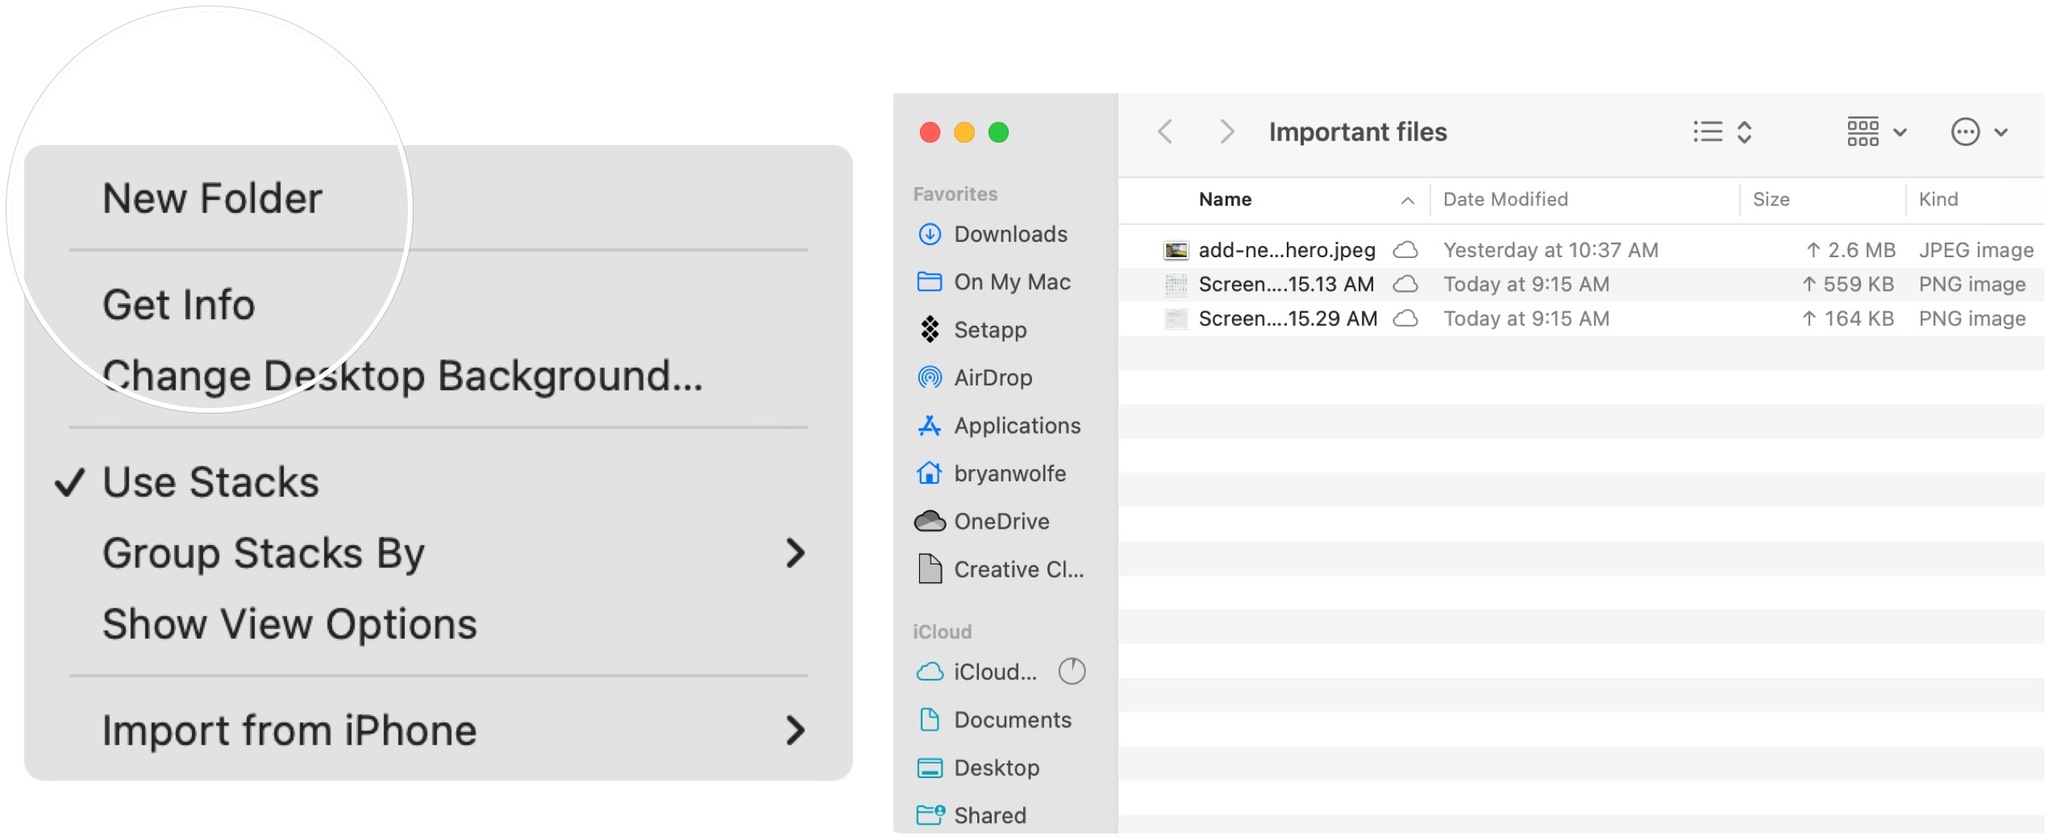
- Create a folder on your Mac. You can right-click anywhere on your computer and choose New Folder.
- Rename the folder when applicable.
- Add the files you wish to encrypt to the folder.
-
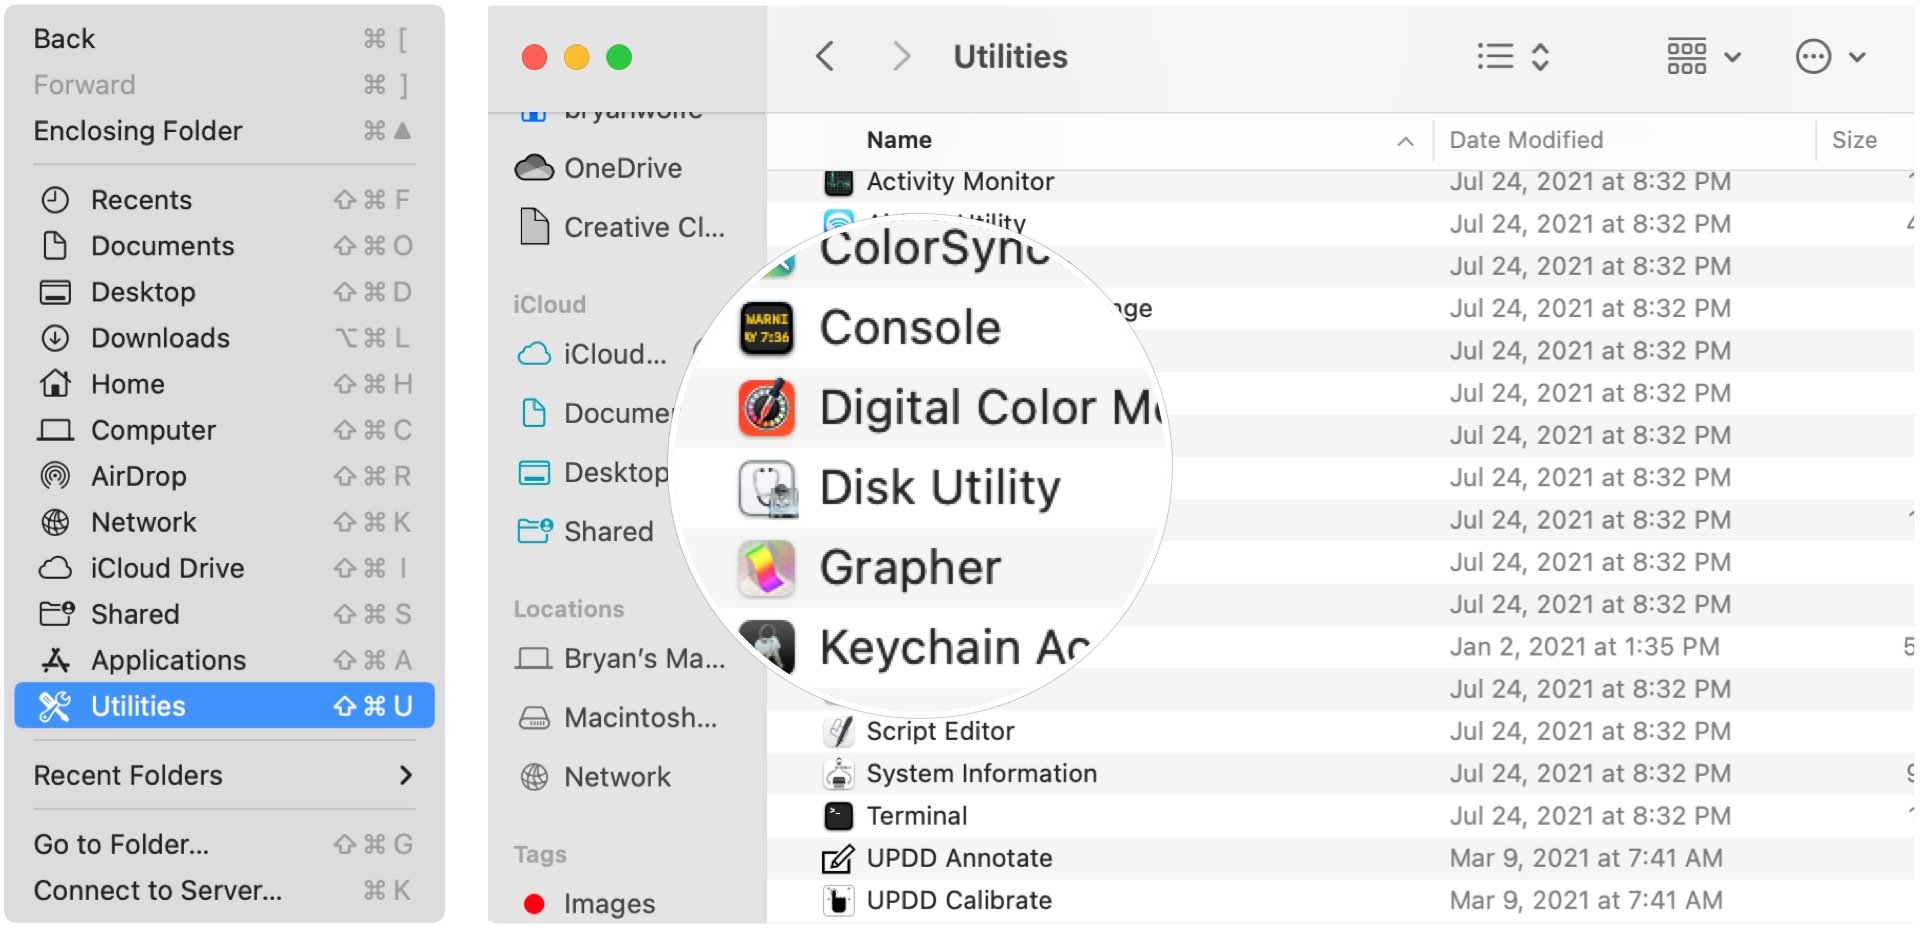
Choose the Finder in the Mac dock.
- Select Go on the menu bar.
- Pick Utilities.
-
Choose Disk Utility.
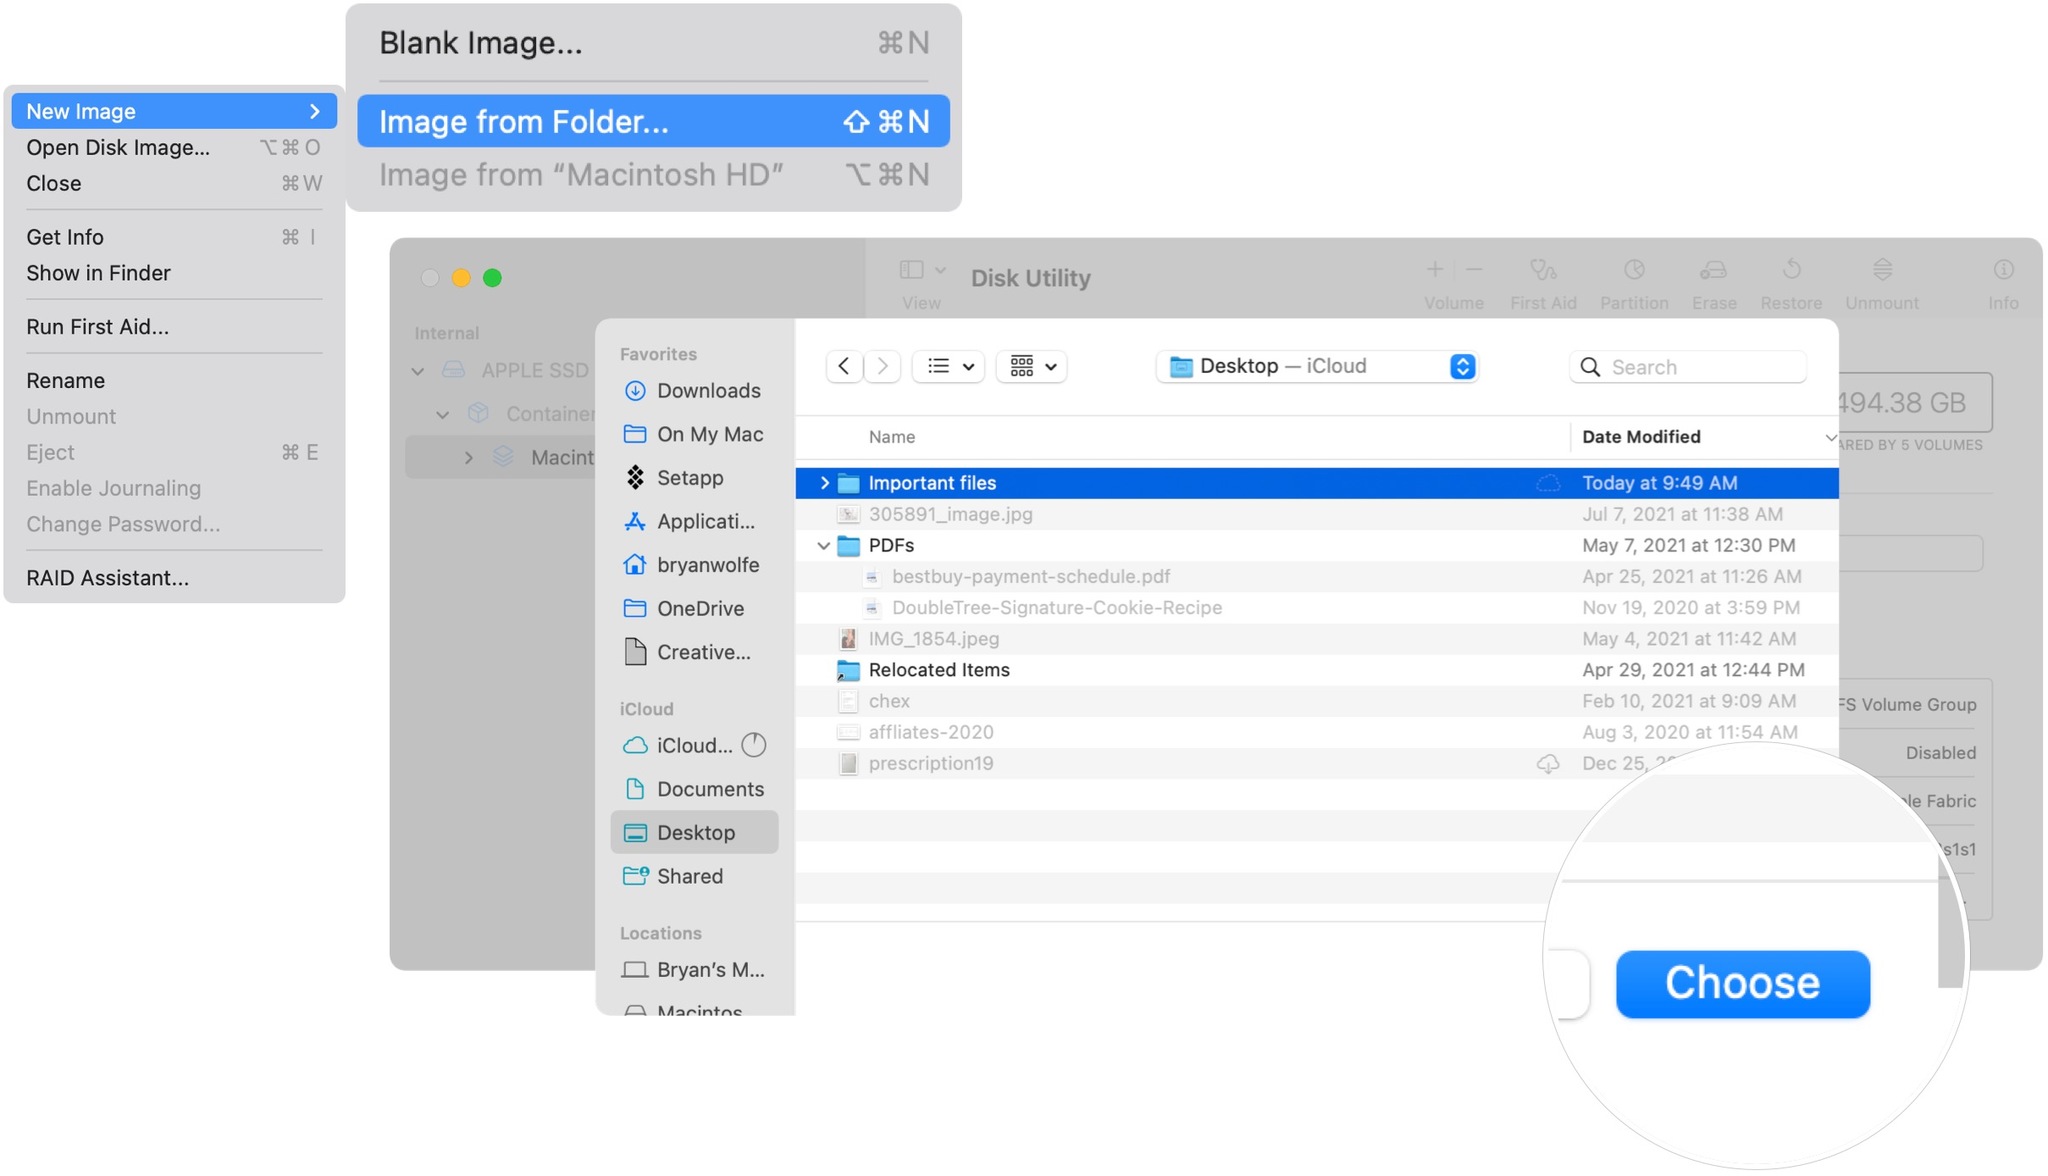
- Select File.
- Choose New Image.
- Pick Image from Folder.
- Find, then highlight the folder you wish to encrypt.
-
Click Choose at the bottom right.
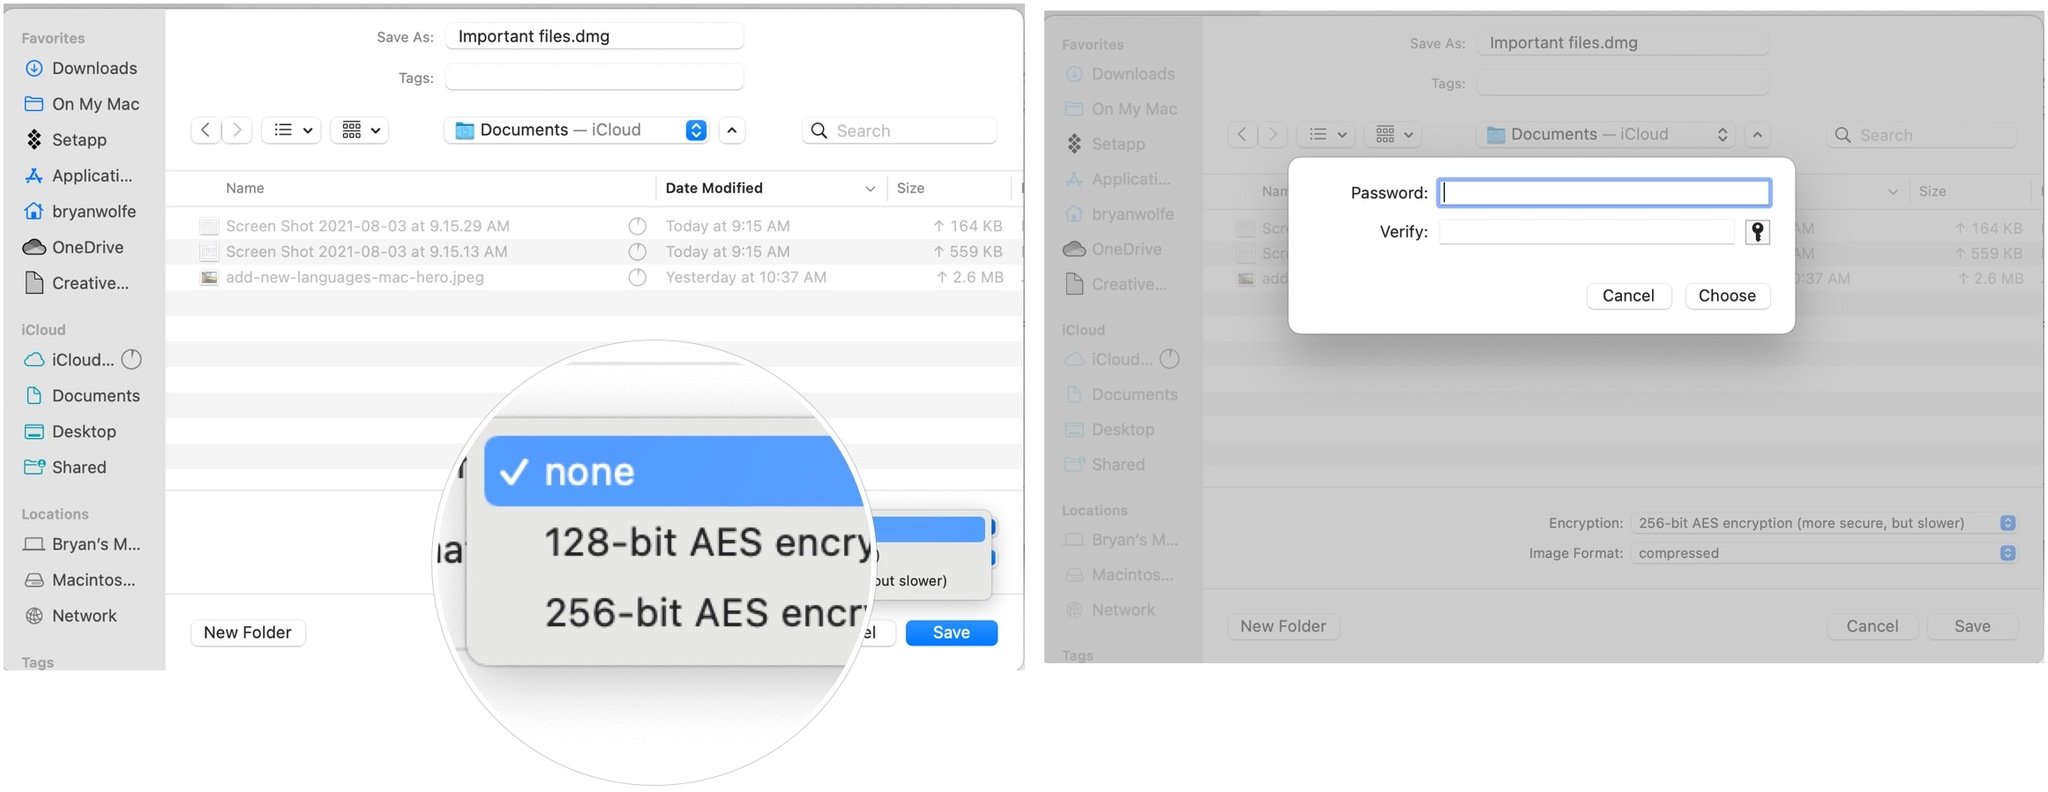
- Toggle your level of encryption (128-bit or 256-bit AES Encryption).
-
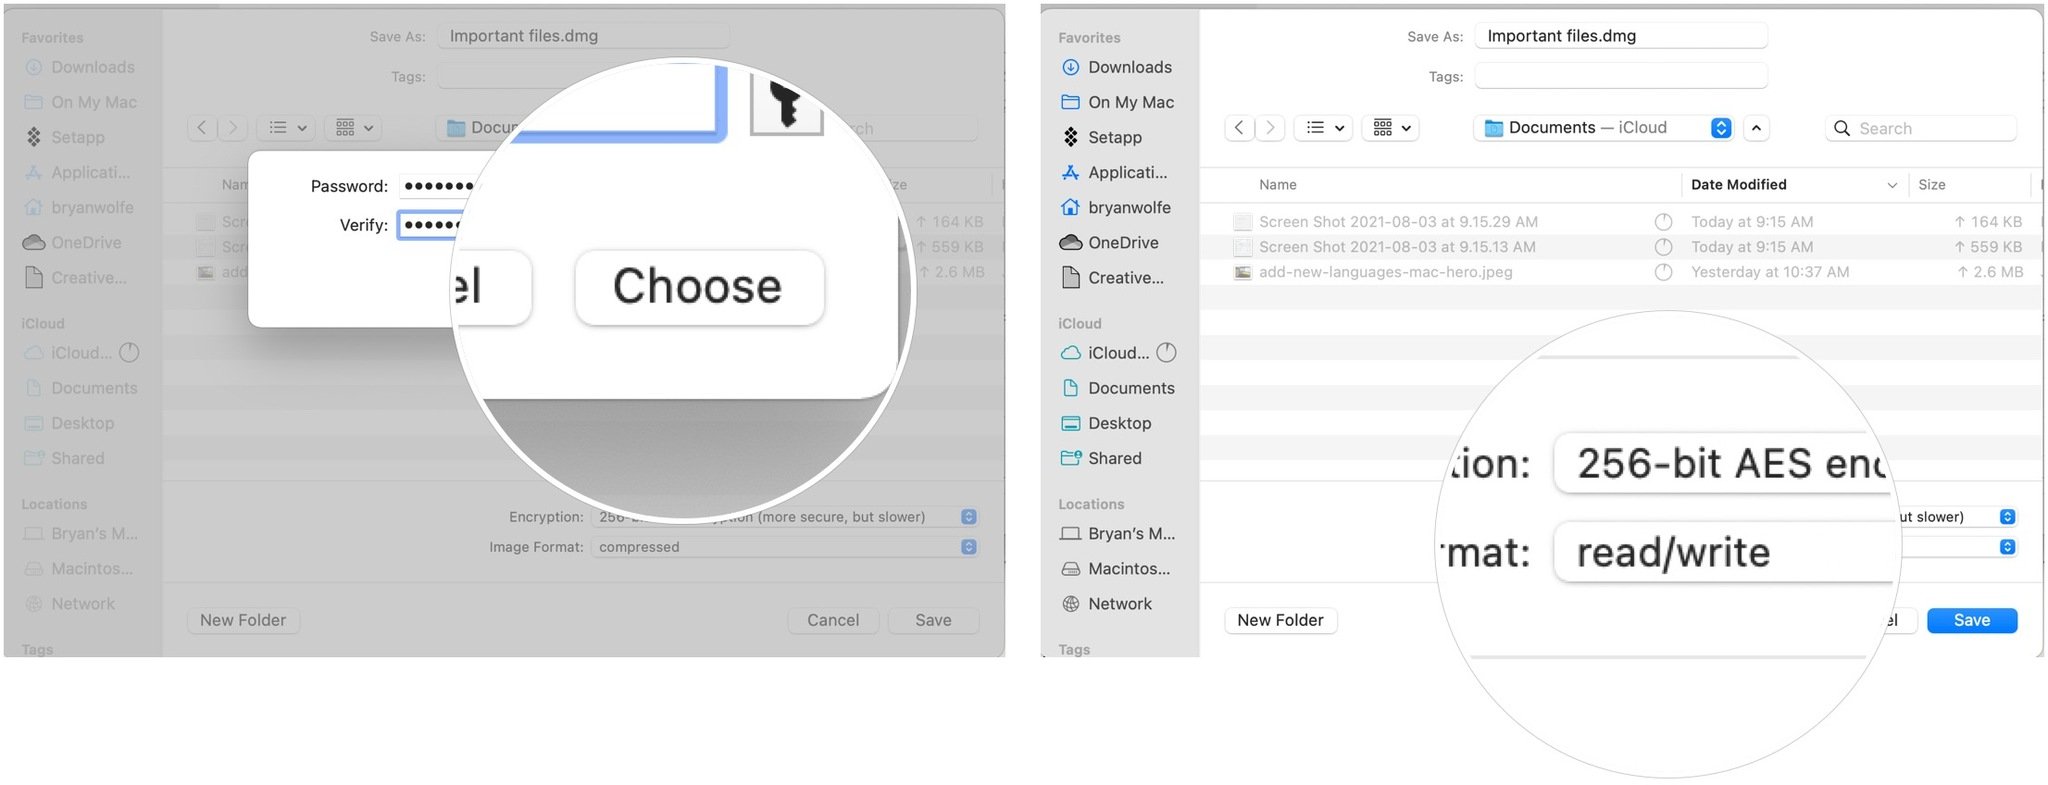
Add a password, then confirm.
- Select Choose.
- Choose Read/Write as your Image Format selection at the bottom right.
-
Select Save to exit the window.
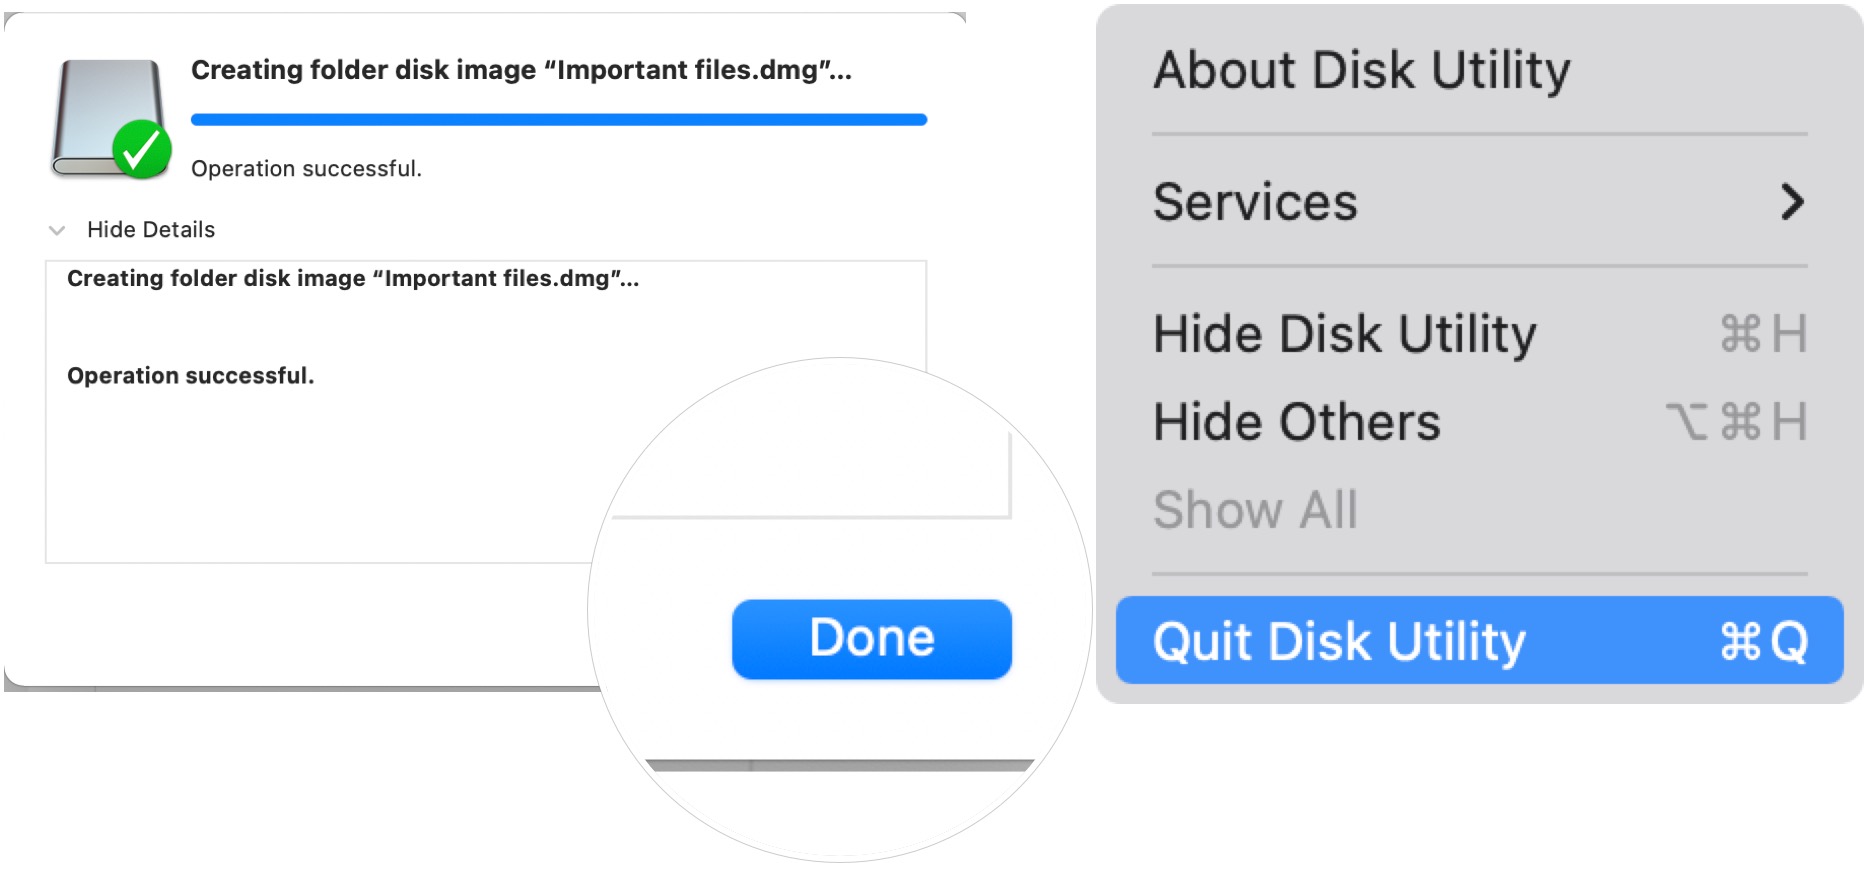
- Click Done when the encryption process completes.
-
Exit Disk Utility.
Your created .dmg file is secure. You can share the file just as you would any other one. Double-click to open it — you'll need to type in the password to complete the process. That's Mac encryption!
Questions?
Let us know in the notes below whether you have questions about Mac encryption or macOS overall.
Use encryption to better protect your data macOS posted first on http://bestpricesmartphones.blogspot.com
No comments:
Post a Comment